2.1 先来一个小练习
在绘制第一个 2D 形状之前,让我们对 Shadertoy 进行更多练习。创建一个新着色器并将起始代码替换为以下内容:
void mainImage( out vec4 fragColor, in vec2 fragCoord )
{
  vec2 uv = fragCoord/iResolution.xy; // <0,1>

  vec3 col = vec3(0); // start with black

  if (uv.x > .5) col = vec3(1); // make the right half of the canvas white

  // Output to screen
  fragColor = vec4(col,1.0);
}
由于我们的着色器在所有像素上并行运行,因此我们必须依靠 if 语句根据像素在屏幕上的位置绘制不同的颜色。根据您的显卡和用于着色器代码的编译器,使用内置函数(如 step)的性能可能会更高。
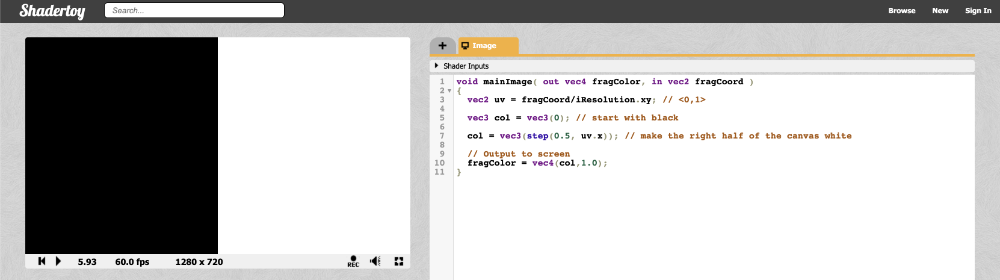
让我们看一下相同的示例,但改用 step 函数:
void mainImage( out vec4 fragColor, in vec2 fragCoord )
{
  vec2 uv = fragCoord/iResolution.xy; // <0,1>

  vec3 col = vec3(0); // start with black

  col = vec3(step(0.5, uv.x)); // make the right half of the canvas white

  // Output to screen
  fragColor = vec4(col,1.0);
}
画布的左半部分将是黑色的,画布的右半部分将是白色的。
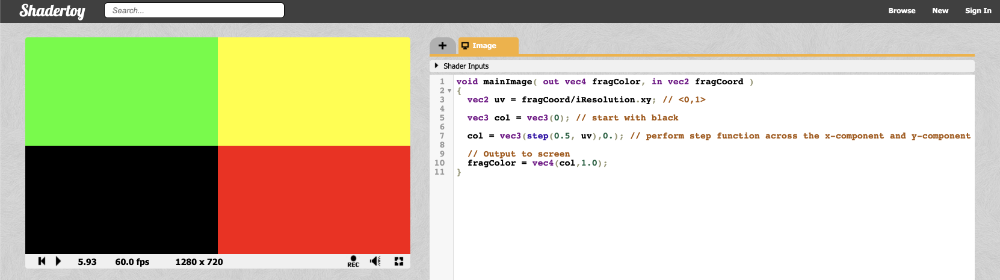
你也可以对向量中的每个分量执行 step 函数:
void mainImage( out vec4 fragColor, in vec2 fragCoord )
{
  vec2 uv = fragCoord/iResolution.xy; // <0,1>

  vec3 col = vec3(0); // start with black

  col = vec3(step(0.5, uv), 0); // perform step function across the x-component and y-component of uv

  // Output to screen
  fragColor = vec4(col,1.0);
}
由于 step 函数同时对画布的 X 组件和 Y 组件进行操作,因此应该会看到画布被拆分为四种颜色。